


In this blog, we’ll learn the skill to make a Microsoft Windows Failover Cluster with Windows Server 2019. The environment may be a two-node cluster with one shared disk.
Environment details:
SRV2019-DC
10.0.0.20
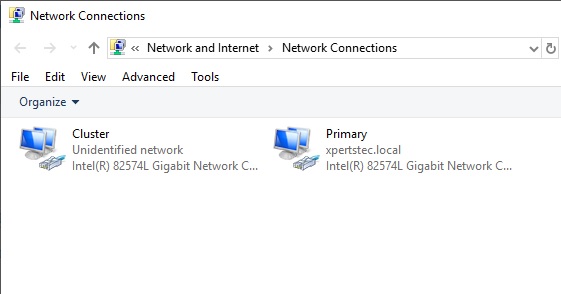
SRV2019-1
Primary – 10.0.0.30
Cluster – 192.168.0.10
SRV2019-2
Primary : 10.0.0.40
Cluster: 192.168.0.20
iSCSI Storage : 10.0.0.100
Cluster Name – XTCLUSTER
Cluster IP Address – 10.0.0.110
1- Before we start, make sure you meet the following prerequisites:
I have 2 Windows Server 2019 machines with the latest updates installed. The machines have at least two network interfaces, I rename them Primary and Cluster.
Join both servers to your Microsoft Active Directory domain and confirm that both servers see the shared memory device available in disk management. So, don’t bring the disk online yet.
2- User the Following PowerShell command to enable failover clustering and management Toole 1 Node (SRV2019-1)
Install-WindowsFeature -Name Failover-Clustering –IncludeManagementTools
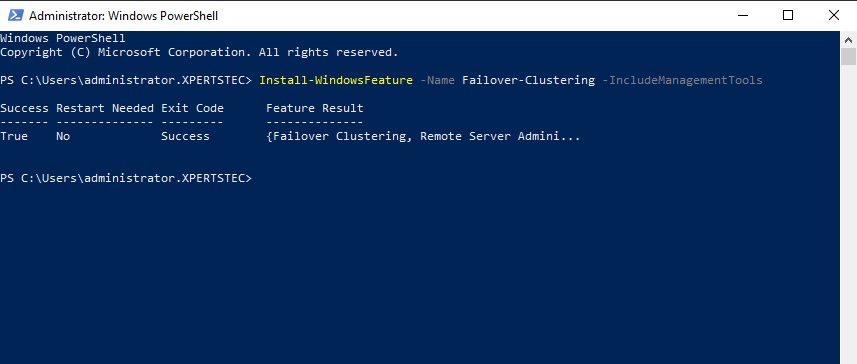
Failover Cluster Server 2019
Enabling Failover Manager Feature in 2 Node (SRV2019-2).
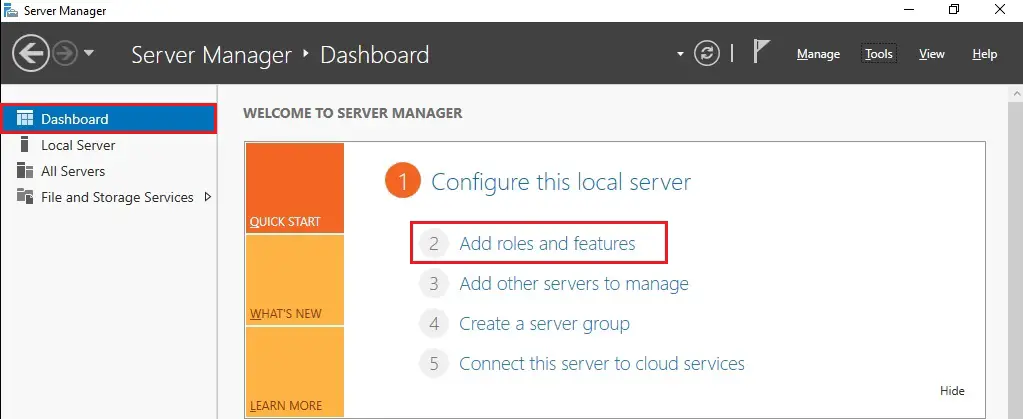
3- Open Server Manage select dashboard and then click on ADD Roles and Features.
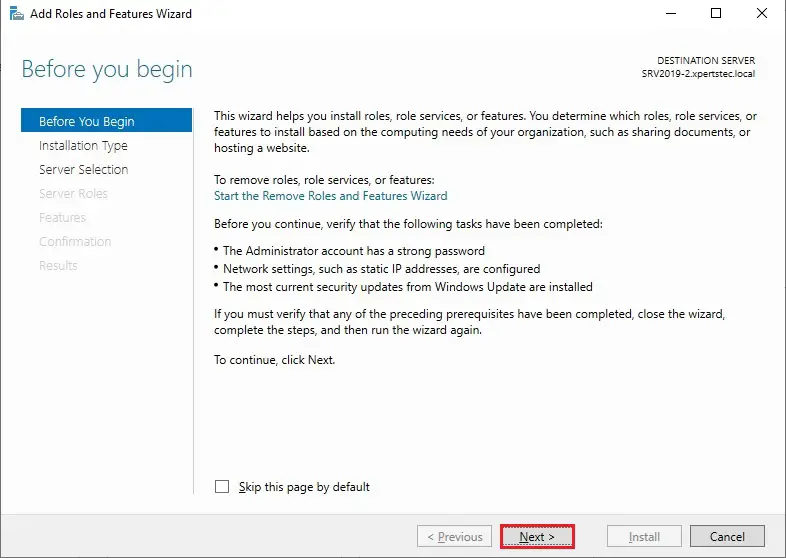
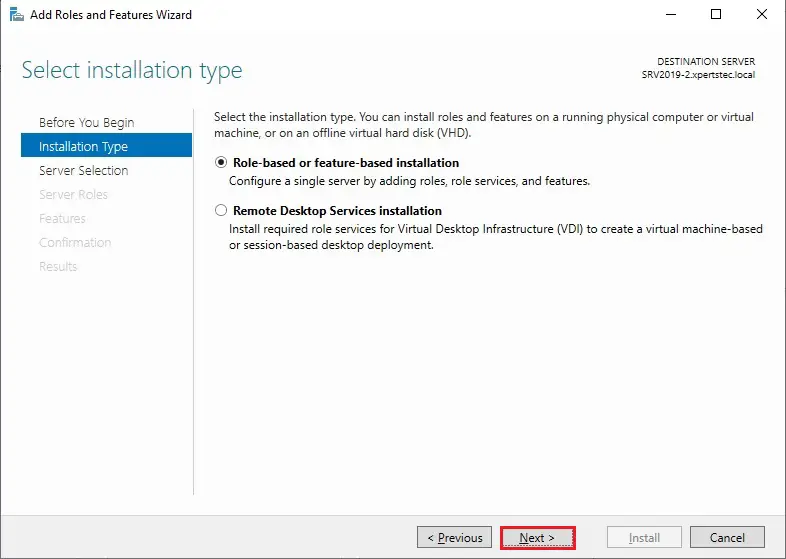
4- So, click Next.
5- Click Role-based or feature-based installation and then click Next.
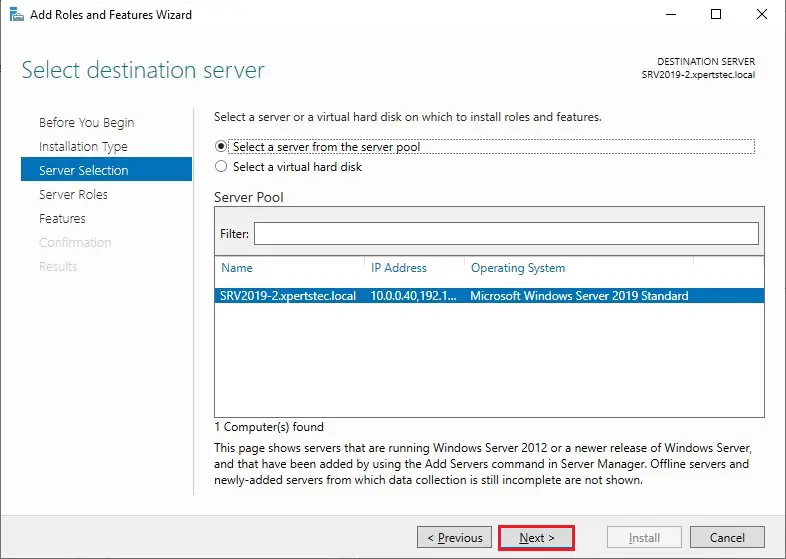
6- Select a server from the server pool and then click next.
7- So, click Next.
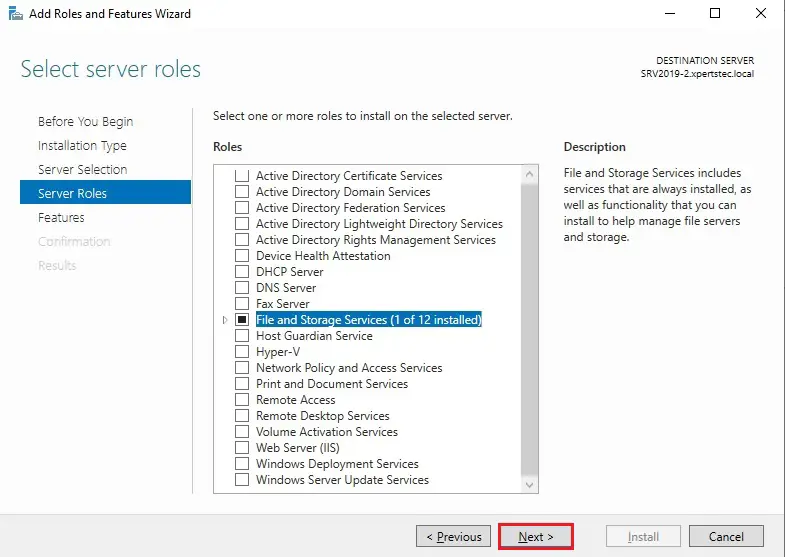
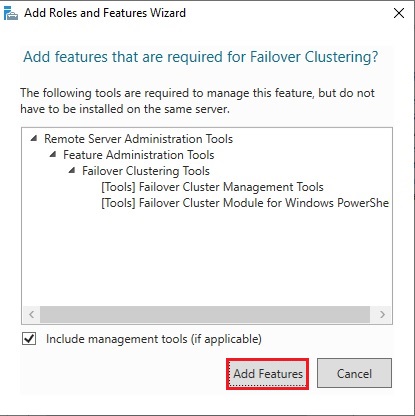
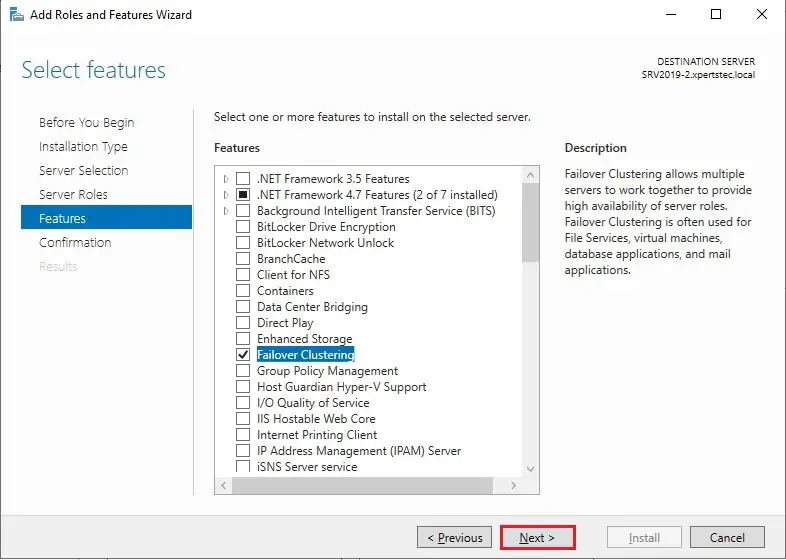
8- Select Failover clustering.
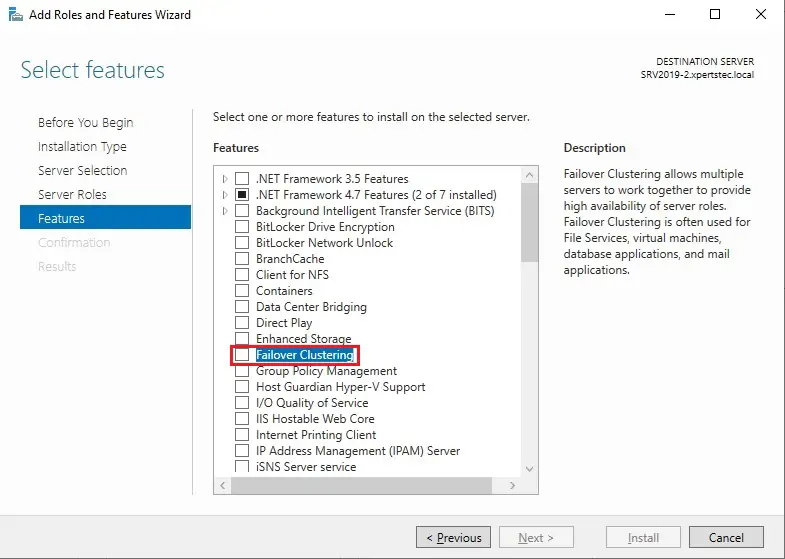
9- Click Add features.
10- After enabling the failover clustering feature so, click next.
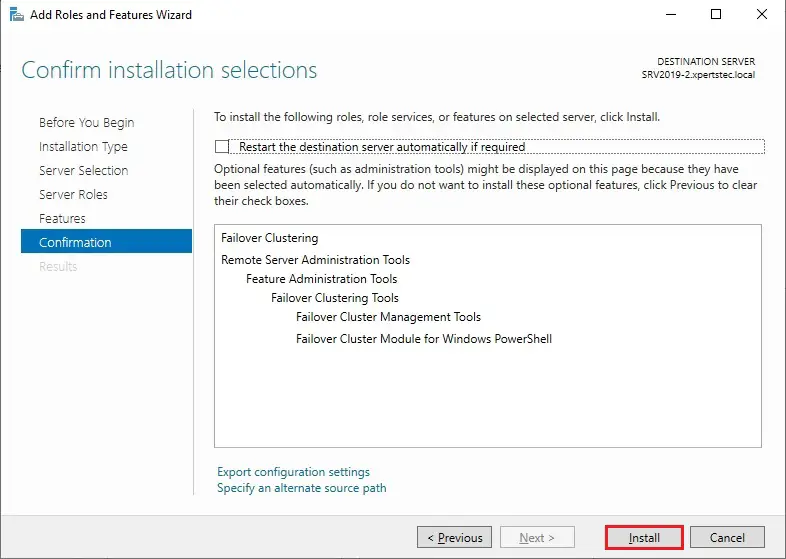
11- Then click Install.
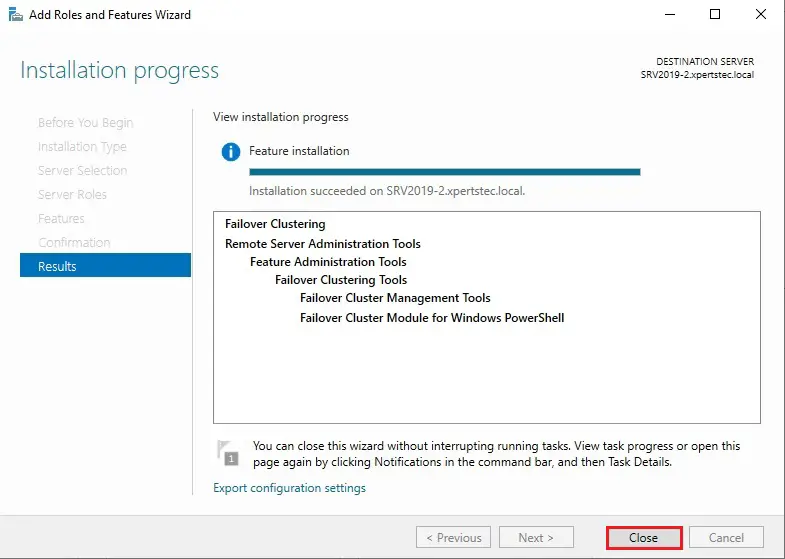
12- Successfully enable the Failover cluster feature so, click Close.
13- After a successful installation, it appears in the Server Manager, click Tools, and then Failover Cluster Manager.

After you installed the Failover Clustering feature so, you can bring the shared disk online and format it on one of the servers 1 Node (SRV2019-1).
The following steps are performed on the 1 Node (SRV2019-1).
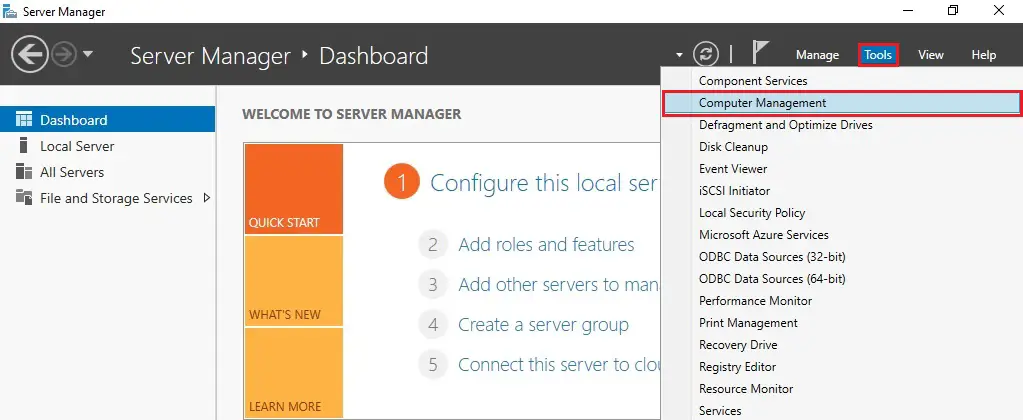
14- In Server Manager click Tools and then click Computer Management.
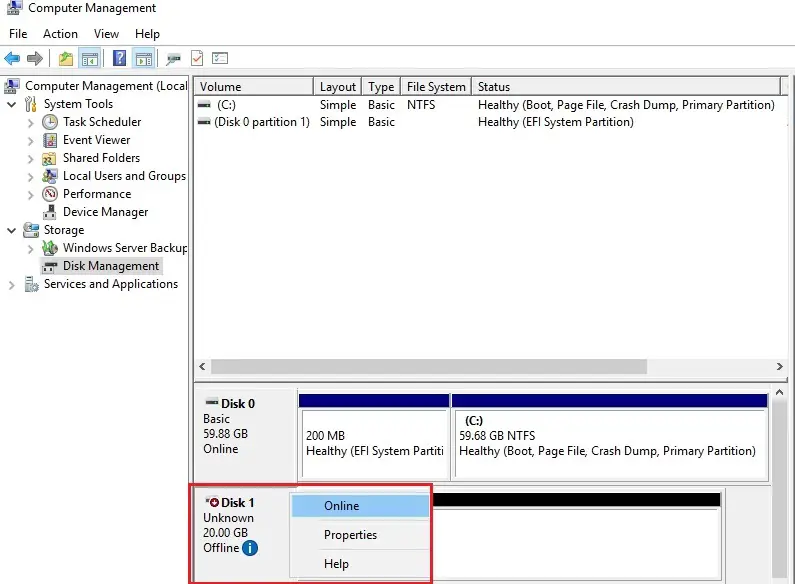
15- Click on Disk Management.
ou will see disk 1 which is in offline status right click on disk 1 and then select Online.
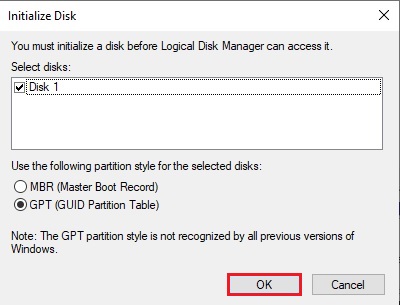
16- Right-click on disk 1 and click Initialize Disk.

17- Click OK.
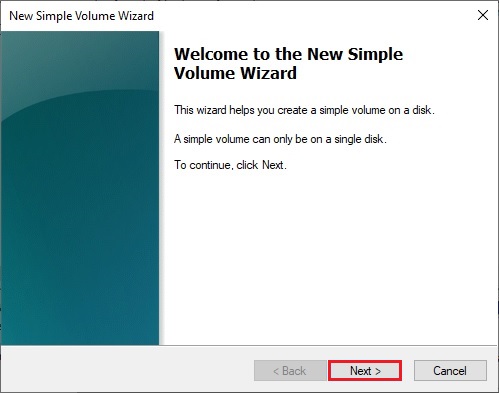
18- Right-click on unallocated disk 1 and select New Simple Volume.

19- Click Next.
20- Click Next.
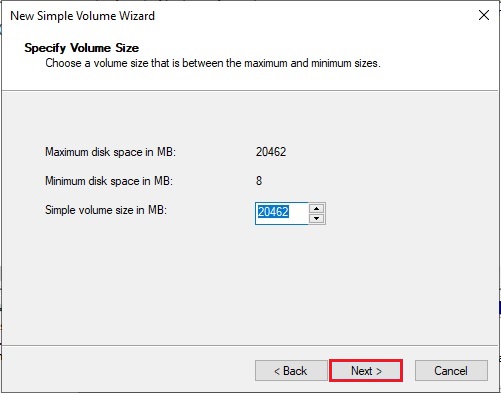
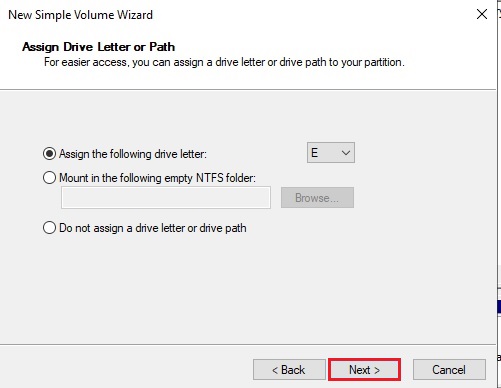
21- Assign a drive letter and click Next.
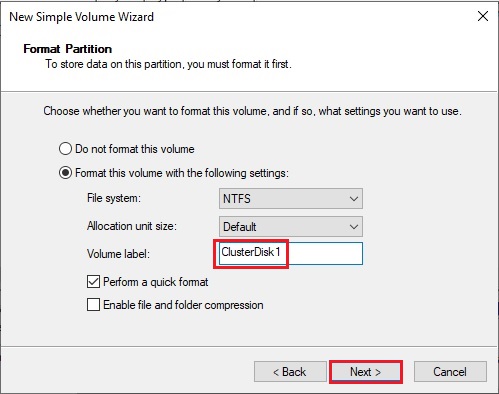
22- Type a volume label and click next.
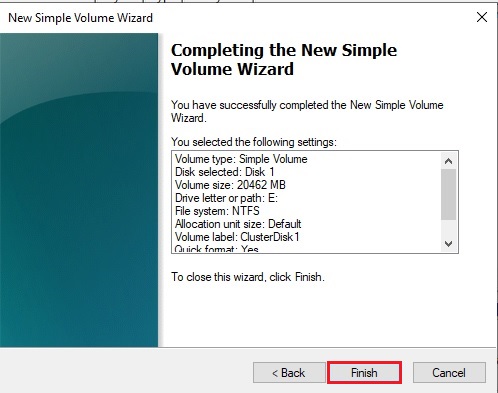
23- Click Finish.
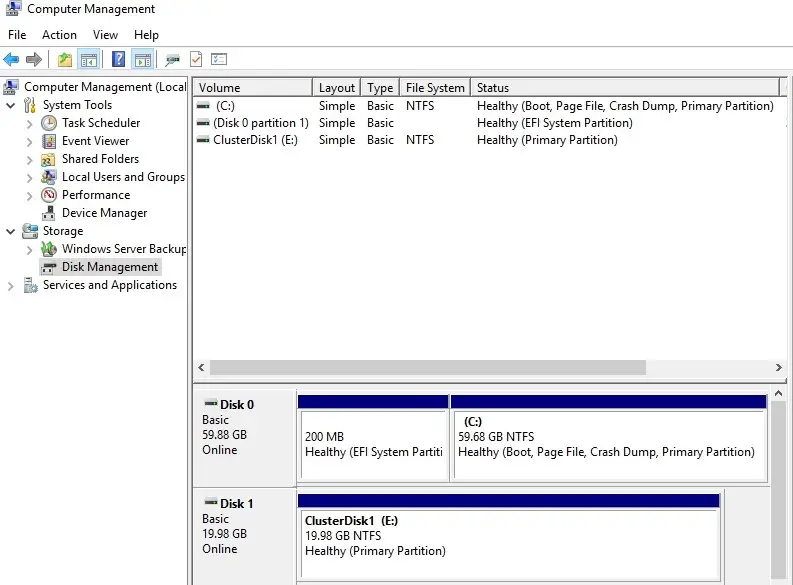
24- 1 Node (SRV2019-1) Disk Management (disk status online)
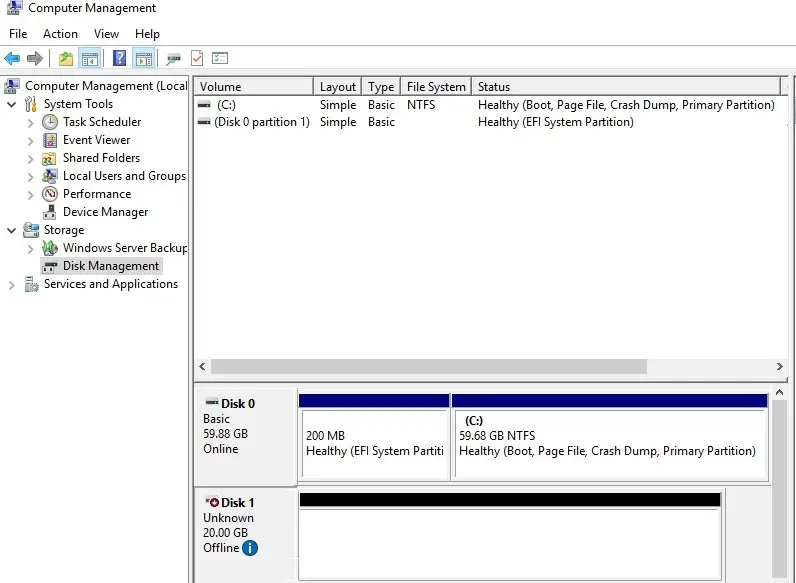
25- Please Don’t change anything on the 2nd Node (SRV2019-2), the disk stays offline. 2ND Node (SRV2019-2) Disk Management (disk status offline).
Failover Cluster readiness check-in 1 Node (SRV2019-1).
Before we create the cluster, we’d like to form sure that everything is about up properly.
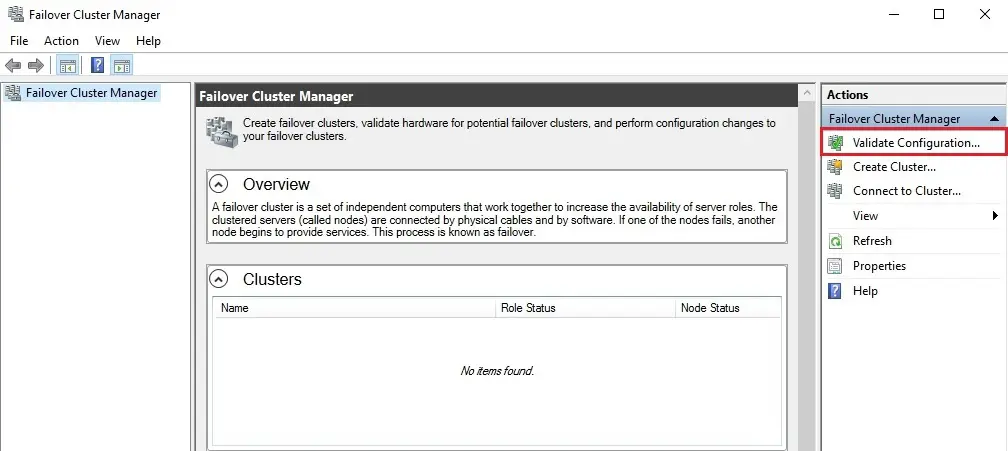
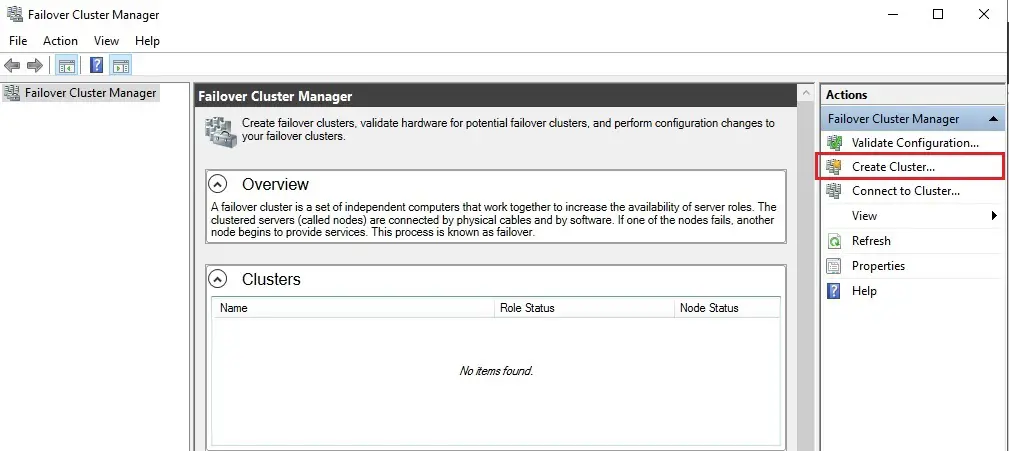
26- In Server Manager click Tools and Click Failover Cluster Manager.

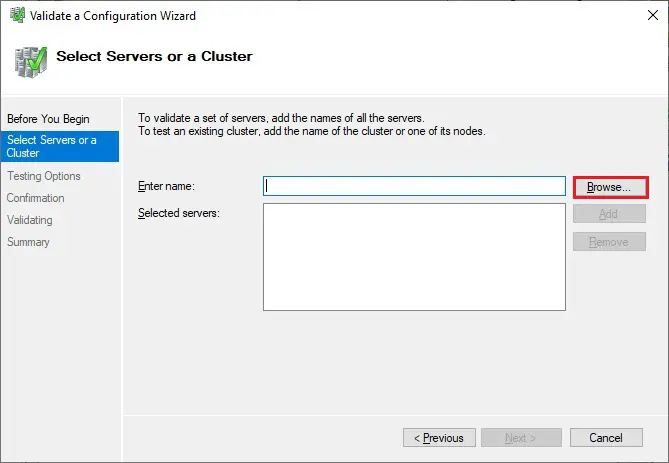
27- Under Action menu click Validate Configuration.
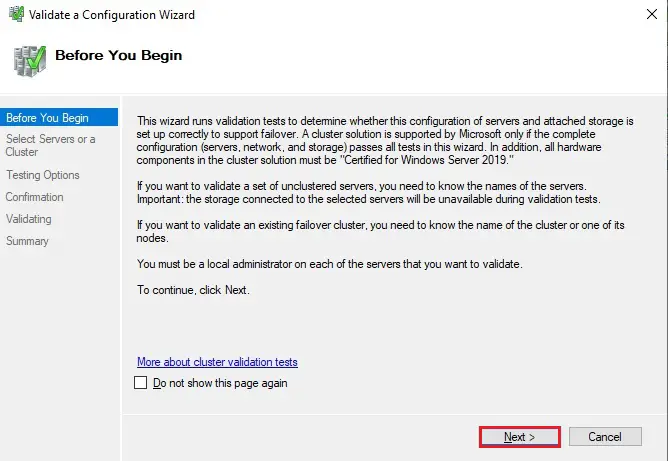
28- Click Next.
29- Select the browse button.
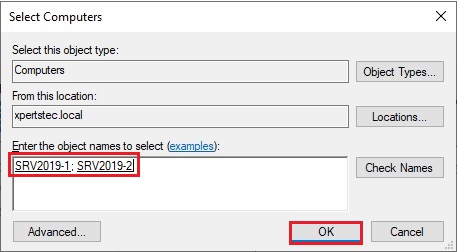
30- Type both the Nodes name, click check name and click ok.
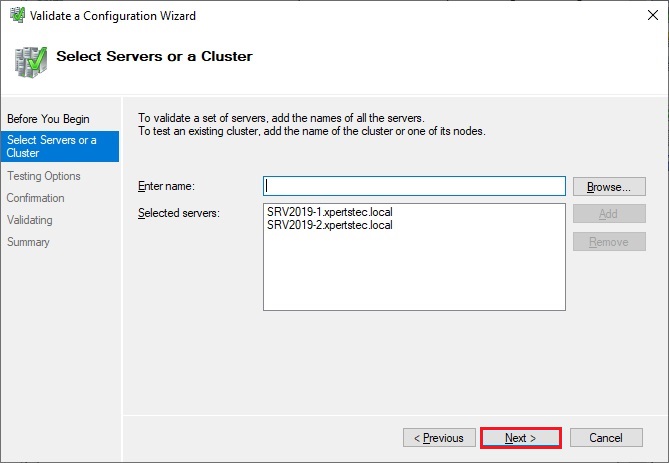
31- After Selecting the two-node servers for validation, click next.
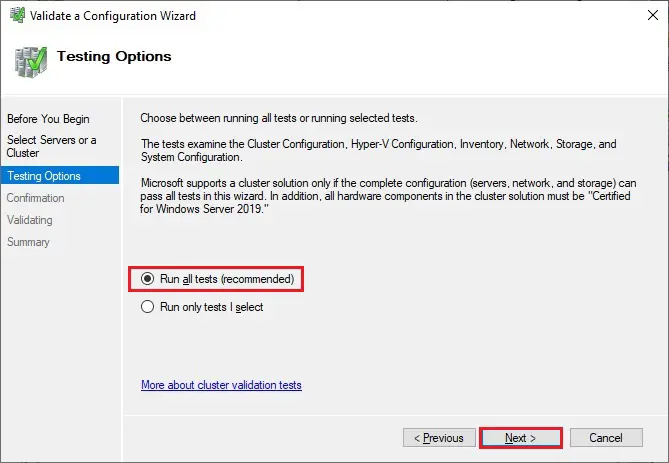
32- Select Run all tests (recommended) and click next.
33- Review the validate configuration confirmation and click next.
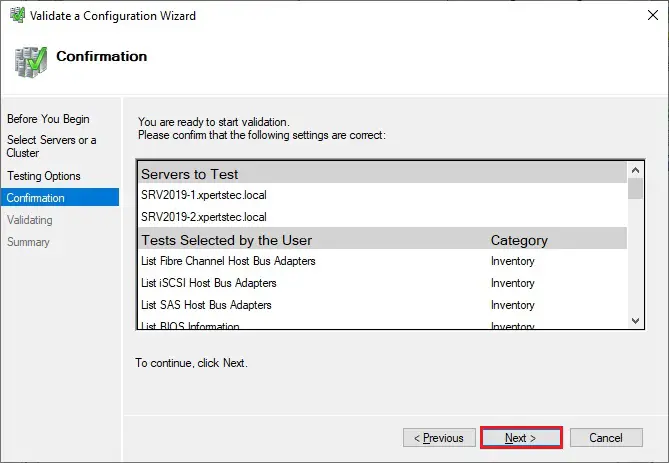
34- Cluster validation testing is in progress.
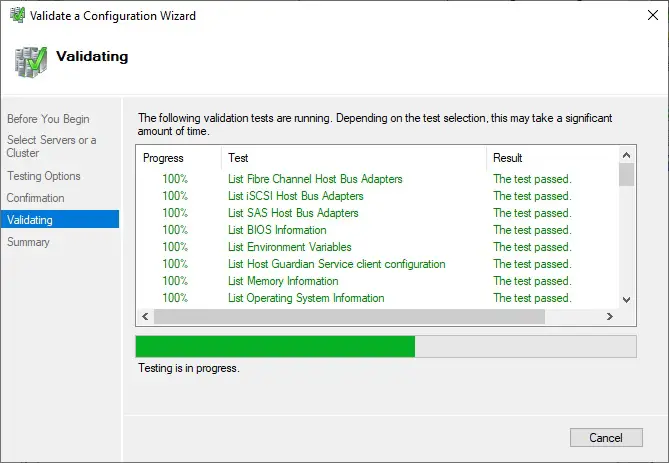
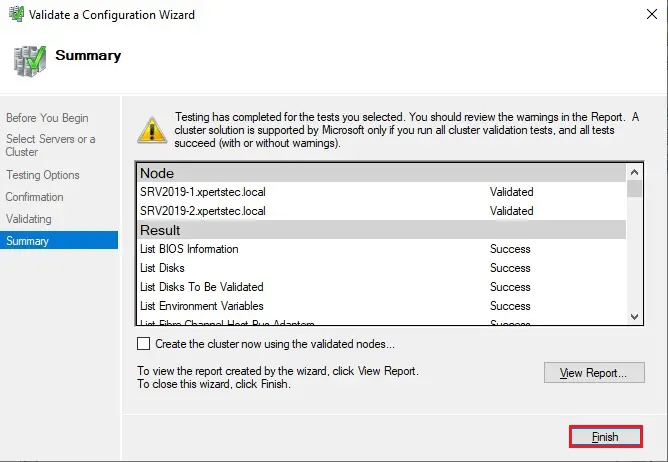
35- After you make sure that every applicable test passed with the status successful. If you have any errors or warnings, you can use the detailed report by clicking on View Report and click Finish.
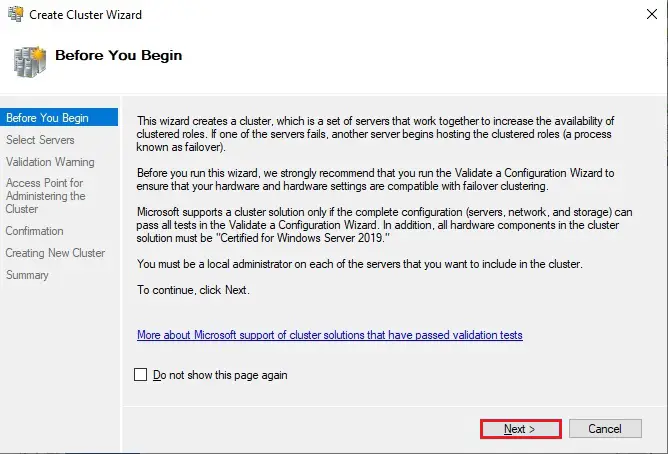
Create a Failover Cluster Server 2019
36- Under Action Menu so, select Create Cluster.
37- Click Next.
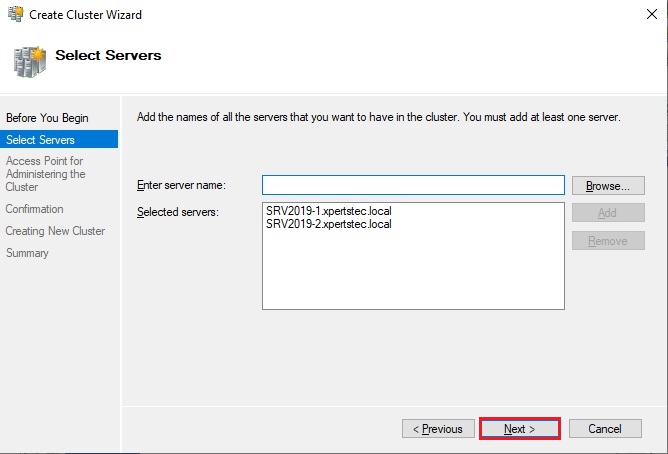
38- Click the browse button.

39- Type both the node names, click check names and click ok.

40- Both the servers nodes selected, click next.
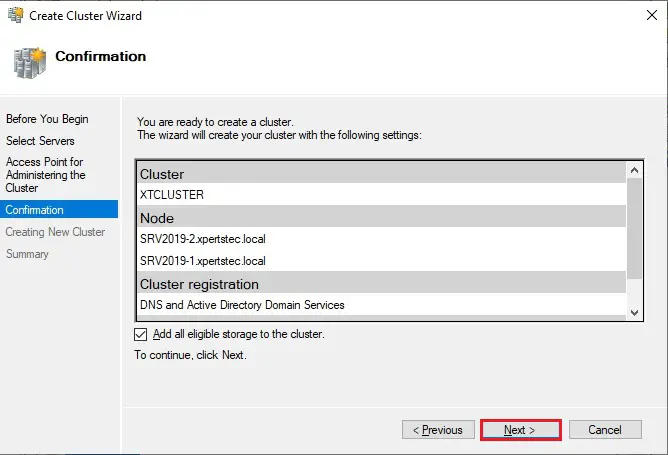
41- Type a Cluster name, select the IP address and click next.

42- As a last step, confirm everything, click next and wait for the cluster to be created.
43- Cluster setup successfully completed and click Finish.
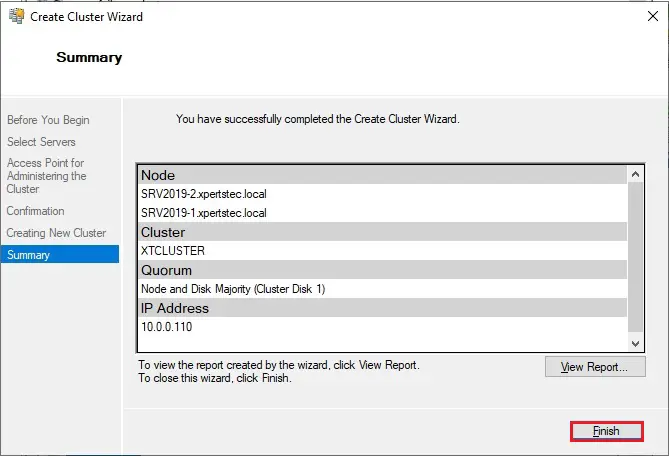
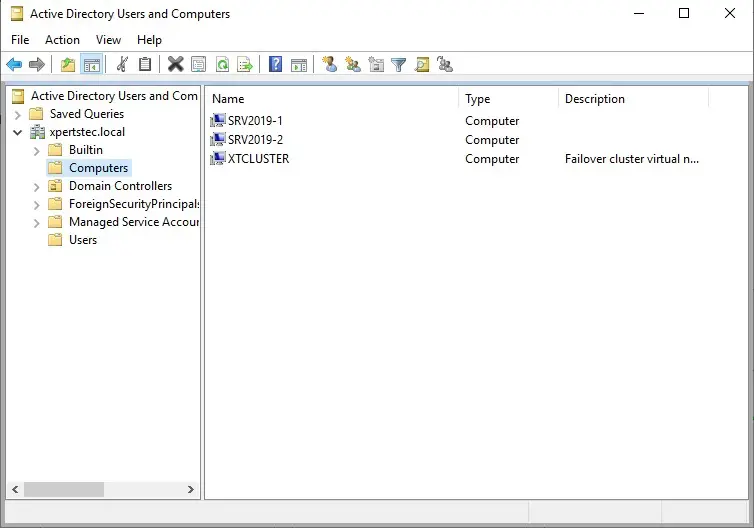
44- The wizard will add the shared disk automatically to the cluster per default. If you did not configure it yet, then it is also possible afterward. As a result, you can see a new Active Directory computer object named XTCLUSTER.
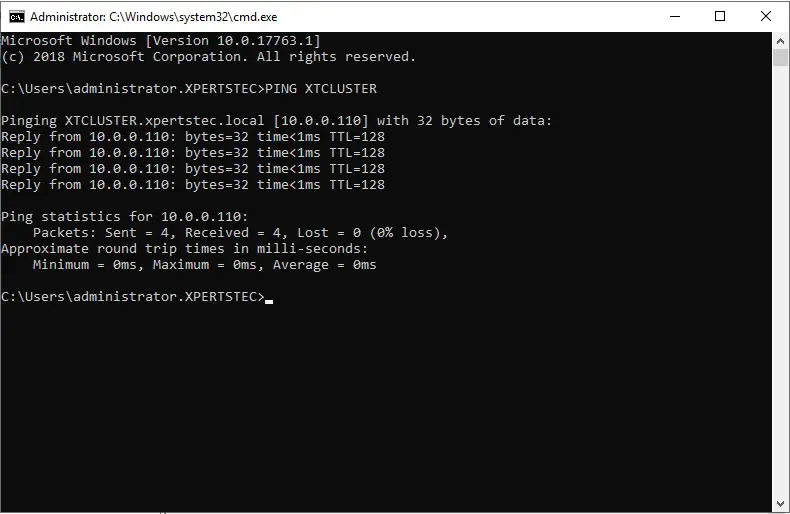
45- You can ping the new computer to check whether it is online (if you allow ping on the Windows firewall).
As an alternative, you’ll create the cluster also with PowerShell. the subsequent command also will add all eligible storage automatically:
New-Cluster -Name XTCLUSTER -Node SRV2019-1, SRV2019-2 -StaticAddress 10.0.0.110
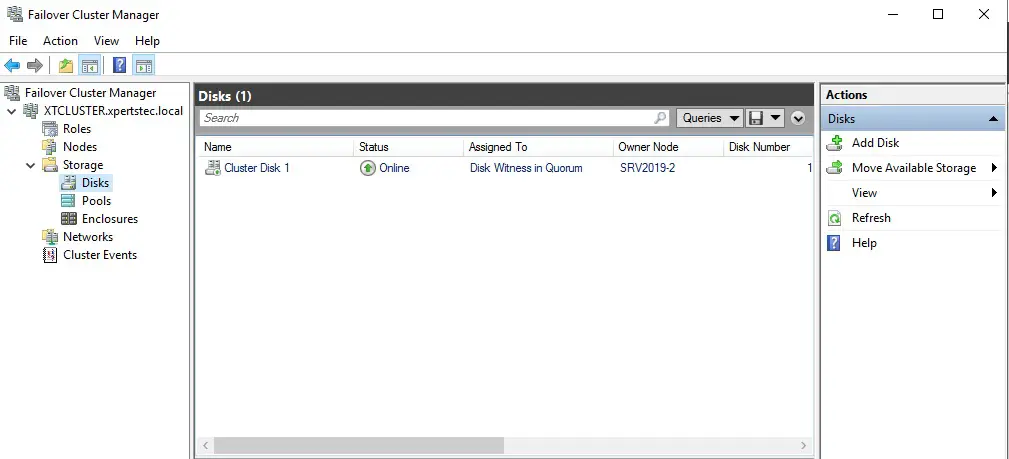
46- Both the Nodes are up now.
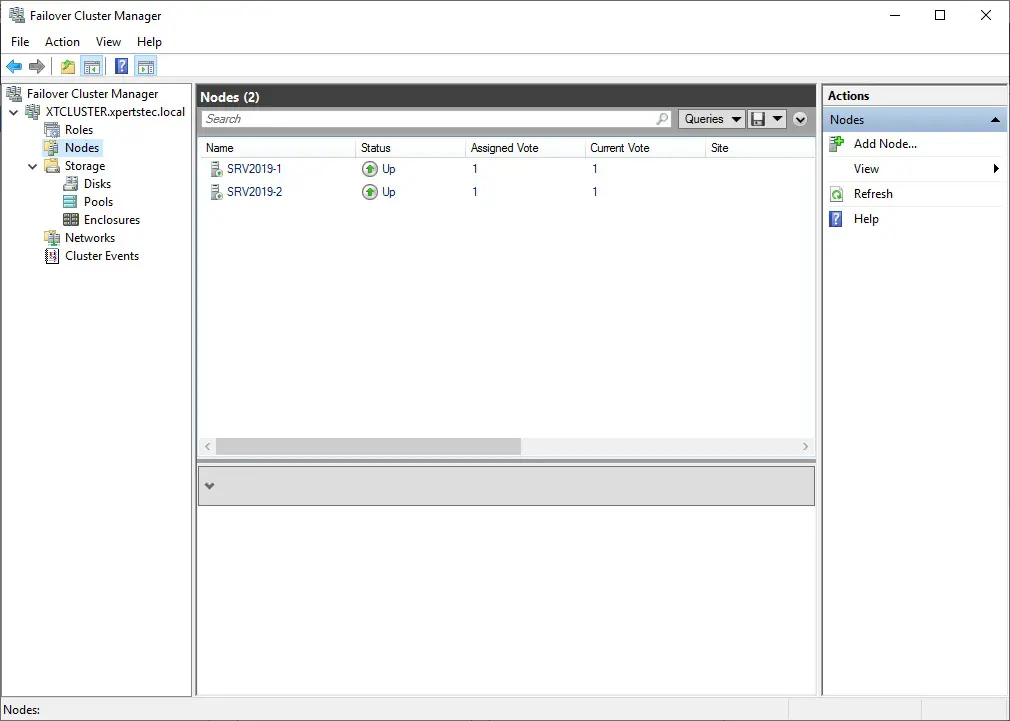
47- You can see the result in the Failover Cluster Manager in the Nodes and Storage under Disks sections.
For more information click here
How to Configure Network Load Balancing In Windows Server 2019.
Amazing blog! Is your theme custom made or did you download it from somewhere? A theme like yours with a few simple adjustements would really make my blog shine. Please let me know where you got your theme. Thanks a lot
I really like your writing style, fantastic information, regards for posting : D.
Dear Gullage,
Thank you for your comments
Aw, this was a very good post. Finding the time and actual effort to generate a good article… but what can I say… I put things off a whole lot and don’t manage to get nearly anything done.
Thanks-a-mundo for the blog article.Really thank you! Want more.
Dear Stormes, thank you
I just want to say I am new to blogging and absolutely savored this blog site. Likely I’m going to bookmark your site . You absolutely come with wonderful article content. Thanks for sharing with us your blog.
Dear Tyron Cuda,
thank you
Hey! I realize this is kind of off-topic however I needed to ask.
Does managing a well-established blog like yours require a massive amount work?
I am brand new to running a blog but I do write in my
journal daily. I’d like to start a blog so I will be able to share my personal experience and feelings online.
Please let me know if you have any suggestions or tips for brand new aspiring bloggers.
Thankyou!
Hi there, I enjoy reading all of your article post.
I wanted to write a little comment to support you.
It’s remarkable for me to have a web site, which is valuable in favor of my knowledge.
thanks admin adreamoftrains hosting services
Hello There. I discovered your weblog using MSN. That is a very well written article. I’ll be sure to bookmark it and come back to read extra of your useful information. Thanks for the post.
I will definitely return.
Dear Clayton,
Thank you
Hello just wanted to give you a quick heads up and let you know a few of the images aren’t loading properly.
I’m not sure why but I think its a linking issue. I’ve tried it in two different browsers
and both show the same results.
Thank you, I will look into it
Hi! I’m at work surfing around your blog from my new iphone 3gs!
Just wanted to say I love reading your blog and look forward to all your posts!
Keep up the outstanding work!
Dear Klaudia, thannk ou